How to Create a Supplemental Warp Pattern
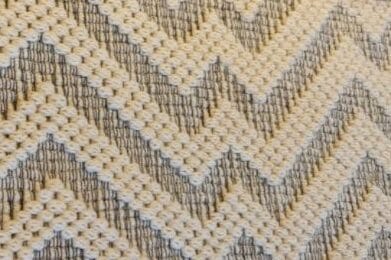
Today I’m going to walk you through the process of creating a supplemental warp pattern starting with a standard weaving draft. This whole adventure started with this inspiration photo.
Today I’m going to walk you through the process of creating a supplemental warp pattern starting with a standard weaving draft. This whole adventure started with this inspiration photo. It was posted in one of my weaving groups and I fell in love with it; the texture and the pattern would fit perfectly in with our living room. However, I had no idea how to achieve this look so I started looking in to different weaving techniques and discovered supplemental weaving. Supplemental weaving is a combination of plain weave with a second warp sitting on top so there are strips of pattern that run lengthwise along the cloth.
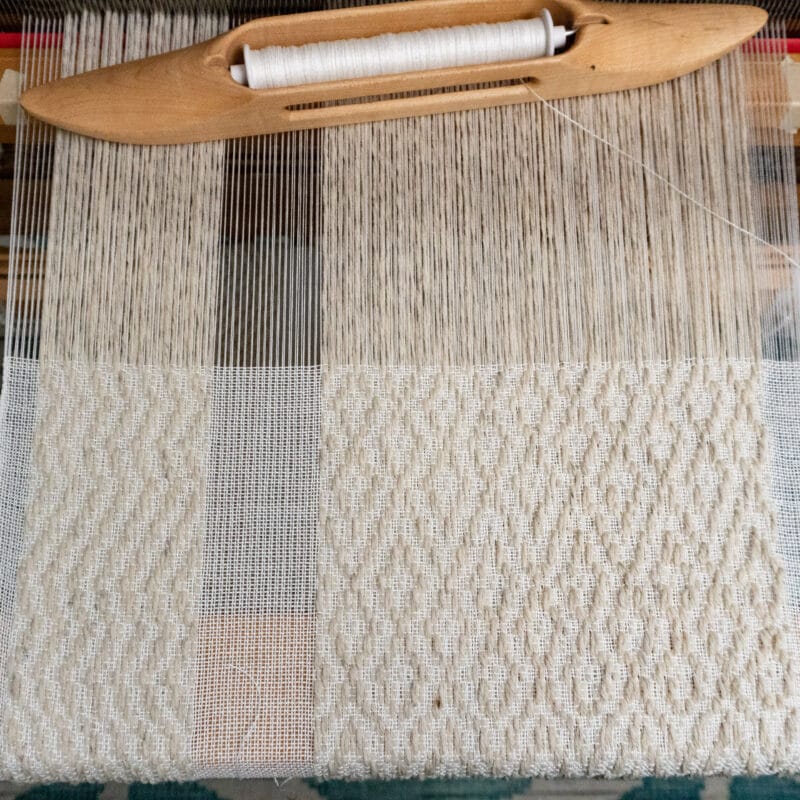
The supplemental weave pattern will sit on top of a background of plain weave, meaning you will need 2 extra shafts than the pattern calls for to thread the plain weave.
You do not need a loom with a second back beam to try out supplemental weaving, but there are a few things to consider before getting started. The supplemental weave pattern will sit on top of a background of plain weave, meaning you will need 2 extra shafts than the pattern calls for to thread the plain weave. I have an 8 shaft loom, so I can only use 4 shaft patterns for supplemental weaves.
Another thing to consider is if you want your supplemental pattern threads to be a different weight than the plain weave. I did, which adds a lot of extra texture to the cloth, but creates a little more work in the planning and sampling phases.
I’m going to cover two examples: the first will be the one on my loom. The pattern starts with a tabby included and will use two different yarn weights. The second will have no tabby and the same weight yarn for background and supplemental warps.
Example 1: Orientating Pattern
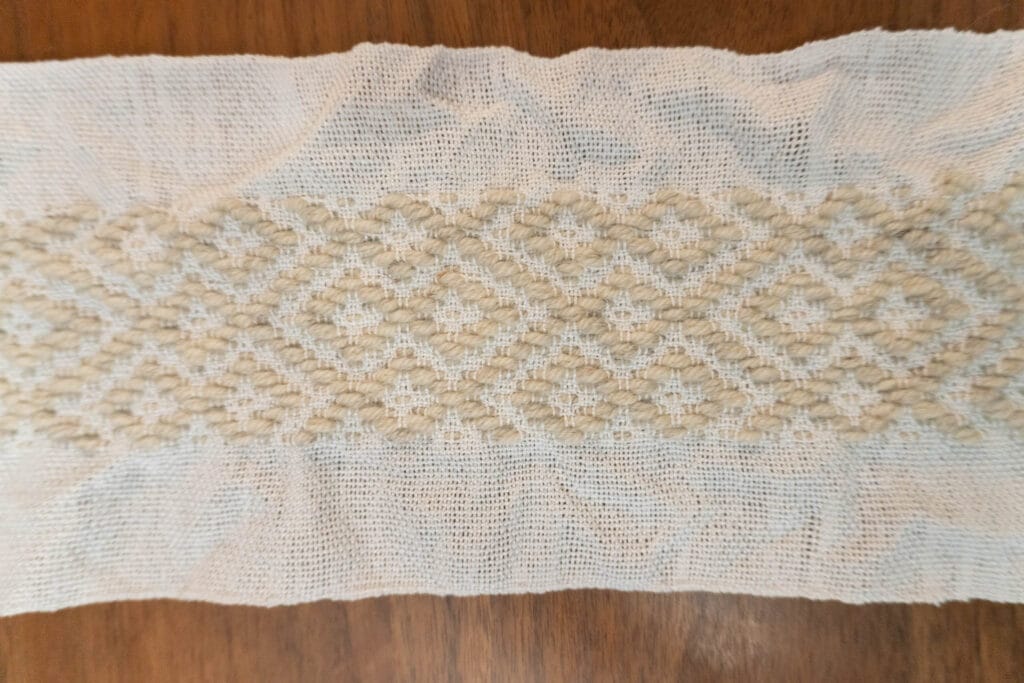
The pattern I chose to start with was Swedish Diamond I (p.130) from “A Handweaver’s Pattern Book” by Marguerite Davison. The draft already has a tabby included AND I decided to turn the draft. This means almost all the pattern manipulation is already complete.
It’s not necessary to turn a pattern for supplemental weaving, but I chose to do so because I thought the pattern looked better turned. To turn a draft you’ll have to rotate the tie-up and treadling clockwise 90 degrees. The threading is then rotated counter clockwise 90 degrees to essentially flip the treadling and threading positions.
In general, for supplemental weaving, the tabby needs to be moved from a left or right position in the tie-up to a top or bottom position. This is why you will always need two additional shafts. Instead of weaving the tabby using treadles, the tabby will be incorporated into the pattern heddles.
Example 1: Incorporating the Supplemental Warp into the Pattern
Remember when I mentioned that the background plain weave goes across the entire warp? This means that the heddles for the plain weave are going to be interspersed between the pattern heddles. If you choose to use the same weight yarn for both warps, then there will be a 1 to 1 heddle ratio for supplemental warp and plain weave warp.
If you choose to use the same weight yarn for both warps, then there will be a 1 to 1 heddle ratio for supplemental warp and plain weave warp.
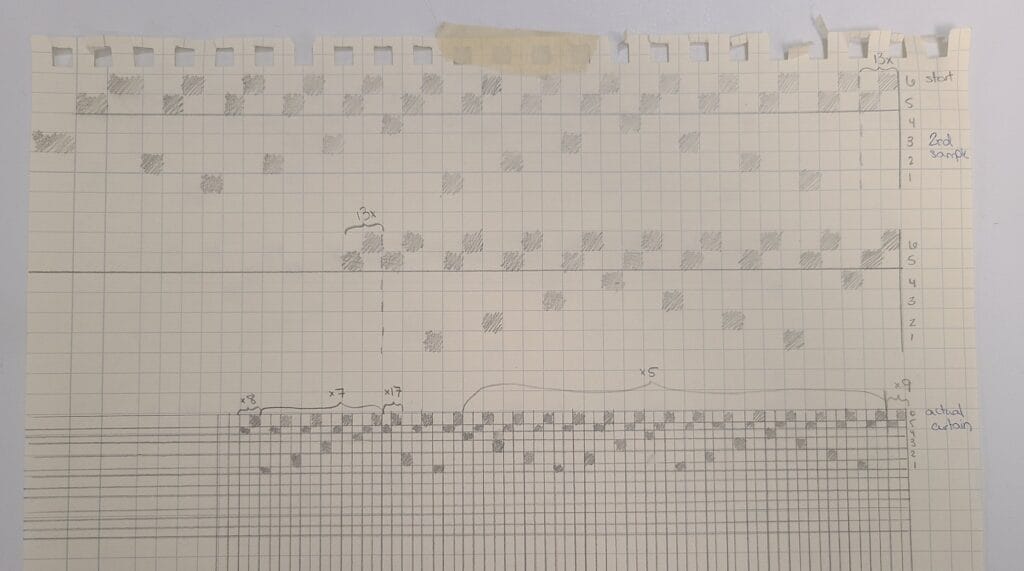
However, I wanted my supplemental warp to be much thicker. I ended up warping it at 8 epi, while the plain weave was warped at 16 epi. I found the easiest way to figure out the heddle threading was to draw it out. My ends per inch ended up making it easy: for every 2 plain weave heddles I needed 1 pattern heddle.
The last thing to do to the pattern was add a second section that used an alternate threading for the Swedish Diamond draft that created a squiggly line. This allowed me to treadle one draft and weave two patterns. Between the sections of supplemental warp I simply threaded the background warp only.
Example 2: Orientating Pattern
The second example is a pattern that does not have a tabby included, I will not be turning the pattern, and I will draft it with the same size yarn for the plain weave and the supplemental warp. From what I can tell, if the pattern you’re interested in using has a tabby, you will need to turn the pattern for it to work as a supplemental weave.
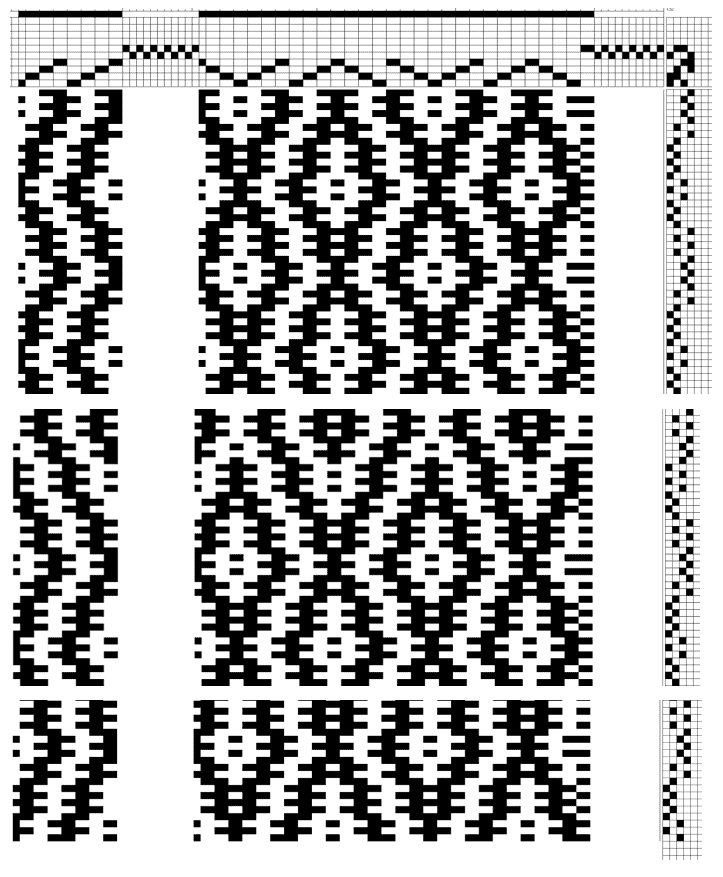
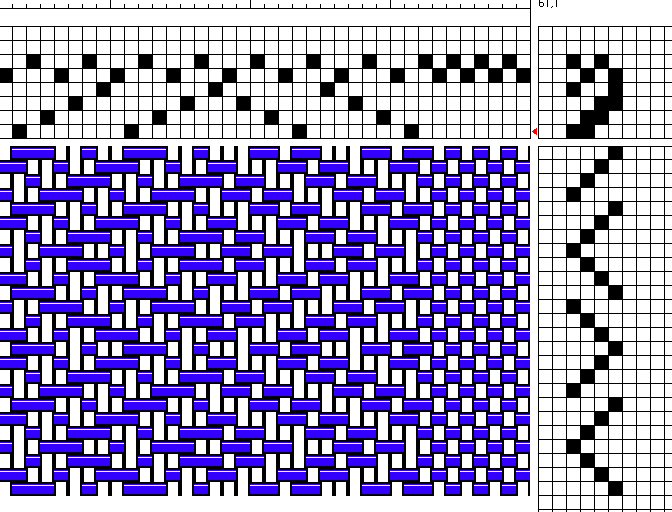
The pattern I chose is “Simplified Damask I” (p. 52) also from Marguerite Davison’s book. The main change that needs to occur to make this pattern weavable with a supplemental warp is adding plain weave to the tie-up and the threading. You can see in the draft, there’s plain weave on shafts 5 and 6.
Example 2: Incorporating the Supplemental Warp into the Pattern
Since this example is using the same weight yarn for both warps, it’s safe to assume the heddles are going to be threaded 1:1. I’ve written this draft with shafts 5 and 6 being the plain weave threads distributed every other between the supplemental pattern warp.
The next phase of the project is weaving! If you want to learn more about dressing a loom with a supplemental warp, please check out my YouTube video. I hope this walk-through helps you tackle supplemental weaving.